Description

I built this PC in preparation for a new job that will require a lot of traveling over the next year or two. Initially I was going to buy a laptop, but I have been generally against laptops since I got into building custom desktops a few years ago. I thought I could make a very small custom PC that would out-perform a laptop, cool better than a laptop, have a better upgrade path / future proofness than a laptop, and cost less than a comparable laptop. I think that I succeeded, although have yet to take it on its first trip.

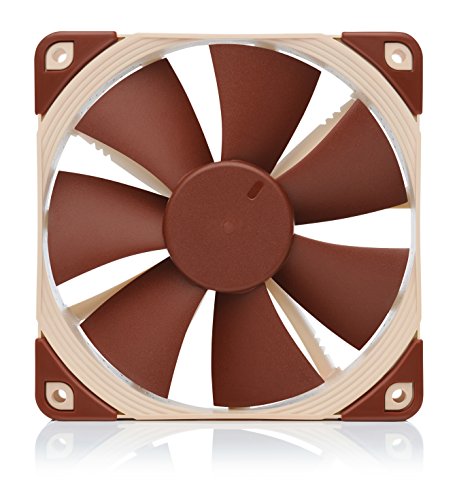
I used a Lian Li PC-TU100 case, with modifications as the foundation for the build. I replaced the front fan with a Noctua NF-F12 PWM 120mm. I cut a hole in the top for a Noctua NF-A8 PWM 80mm, and two holes in the bottom for a pair of Noctua NF-A9x14 PWM 92mm slim fans. All fans received appropriate grills as well. I also removed the lower drive mounting tray, and cut and drilled the top optical drive tray to accept a 2.5 inch drive sideways and still clear the 80mm. Lastly, I notched the lower rear horizontal support bar to create space for a pair of SSD's behind the motherboard.

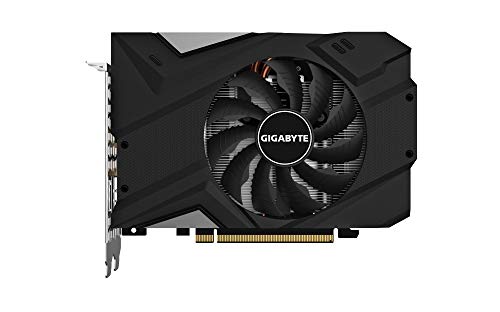
The computer inside is based on an MSI H310I Pro mini ITX motherboard. I don't plan on overclocking the CPU, but I bought an i5-9600k in case those plans change later, and put that in the LGA1151 socket. I also installed 32GB of Corsair LPX DDR4 2666 memory. The Noctua NH-L9I fits in the system perfectly, and there was even space to replace its low profile 92mm fan with a full size Noctua NF-B9 PWM 92mm, which I did. Later I found that the stock Noctua mounting screws were interfering with my plan to mount SSD-s behind the motherboard, and I found much lower profile M3-.50 x 6 screws at home depot, which I installed along with nylon washers for secure mounting as well as conductive isolation. The power supply was opened up (there goes the warranty) and the stock Corsair fan was replaced with a Noctua NF-A9x14 PWM 92mm slim fan powered through a 2-pin to PWM adapter. Lastly, the RTX 2070 was installed , and although it BARELY fits both in length and height (because of the bottom mounted fans), fit it does. Finally, I installed a Gigabyte CNVi WiFi and Bluetooth module.

I hand made the cables for ATX and CPU power, as well as SATA power for the top SSD, and a MOLEX to 2 x SATA power for the rear mounted SSD's, as well as the cable for the RTX-2070. All cabling was sleeved in paracord which is a desert camouflage pattern, and complements the colors of the Noctua fans nicely.

As a final touch, I "cobra stitched" the top handle in a matching paracord wrap which looks nice, ties the interior and exterior together, and makes the handle much more comfortable to grip.

I also have a G-Story GS173HR portable monitor, a logitech K400plus wireless keyboard and trackpad, a Corsair Harpoon RGB wireless mouse, and a Corsair HS70 SE headset. All of these items fit easily into my backpack, and the entire system only has three cables when it is all set up. If I am using it in a location (hotel room) where I don't need the G-Story monitor, then it runs on just two cables.

Future plans include addition of taller feet to help the bottom mounted fans breath better. I also have a Corsair H60 120mm AIO. I know that people have installed these in this case before, and at some point int he future I may explore this option as well, particularly if I decide that I want to overclock the CPU.

Update

I wasn't happy with the two SSD's behind the motherboard being loose back there, and so I spent some time over the last couple of days measuring, cutting, drilling, and acquiring specific fasteners to make it all fit. I created to vertical bars with mounting points for the two SSD's, and riveted them in place with low profile rivets. The side panels fits perfectly, and the SSD's are now very secure.

I also noticed that the stock feet were barely high enough for the grills under the case to clear the surface that the computer sat on. During some GPU stress runs I noticed that the temperature on the RTX2070 ran significantly cooler if I elevated the front of the case creating an area of clear air to feed the two 92mm fans blowing into the GPU. I ordered a set of MNPCTech aluminum case feet, and installed them as well. Now the GPU breaths better and runs cooler.

Log in to rate comments or to post a comment.

Comments

Colonel_Beast
  • 5 years 9 months ago

Holy crap, this is awesome! You made use of basically all the available space, and then some. I'm loving the military-esque color scheme, and the PSU looks really cool with the Noctua fan in it.

Well done! +1

drferrell
  • 5 years 9 months ago

Very compact, I love it!

How was it replacing the fan in your psu by the way? Mine has a bit of a wine to it despite it being double ball bearing (EVGA brand) and I figured it would be cheaper to swap the fan than buy a whole new power supply for something so trivial.

Chooko
  • 5 years 9 months ago

Yeah, about that...

There are a couple of things to consider.

  1. It MAY be dangerous. Depending on who you ask, the capacitors inside the power supply might hold enough charge to electrocute you even after the power supply is disconnected. It sounds like an old wives tale to me, but I am still very cautious about what my fingers are touching inside the power supply, and I use plastic tools to push connectors, etc, in to place.

  2. It will defiantly void any warranty on the power supply.

With all of that said, I've opened several and they are generally very easy to open up. There are usually 4 or so screws holding the lid on, and the fan is usually attached to the lid by 4 standard fan screws. Most use a 120mm fan, although you need to check yours for size. Lastly, many seem to use 2 pin fans. I found an adapter on Amazon for mine so that I didn't have to modify the PWM wiring on the fan. Other power supplies may use standard 3 or 4 pin headers for the fan. It will vary.

There are some good videos on Youtube about this as well.

drferrell
  • 5 years 9 months ago

Thanks for the input. I am very aware of the capacitors being able to hold a charge after being unplugged (but still thanks warning me). I think that the way to discharge the capacitors would be to plug it into the motherboard after unplugging the PSU from the outlet, but I might be wrong and I don't want to test that.

I was originally worried about swapping the fans in general and having to plug it in. Thanks for answering that question for me but the way. What model of fan did you use and do you still have a link to the adapter you used?

Chooko
  • 5 years 9 months ago

I think I used this one:

https://www.moddiy.com/products/4-Pin-Standard-Fan-Connector-Male-to-GPU-Mini-2-Pin-Connector-Female.html

Sorry, I misspoke earlier, since this is not Amazon. I used a Noctua NF-A9x14 PWM 92mm slim fan, and it fit perfectly. I'm not sure if it would fit your EVGA , or if you could get a full thickness fan in there instead.

drferrell
  • 5 years 9 months ago

Thanks! Mine uses a 140mm fan so I'm going to start there. I used to just leave it on ECO mode were the fan wouldn't even come on until it hit a certain load then suddenly my system would crash whenever I would put try to play games. I think the components were over heating so I can no longer use the ECO mode.

kingtanky
  • 5 years 9 months ago

Think this is definitely an underrated build. Awesome work! +1

MTHD
  • 5 years 9 months ago

This is the case I fell in love with before meeting their Q-21 model, I haven't built in mine yet but your build inspires me to do the same space-saving tweaks that you have.

+1 for a beautiful build!

Chooko
  • 5 years 9 months ago

Yeah, this is the first Lian Li that I have built in. It definitely wont be the last, because I really like the materials and build quality. Its also such a unique case and really fits a niche in the market. I took mine out yesterday, and it worked great as a travel PC. The only issue is that the weight is biased toward the back because of the PSU being back there. I'm thinking about adding some ballast to the front to balance it out.

znd125
  • 5 years 5 months ago

Very impressive

Chooko
  • 5 years 5 months ago

Thanks! I appreciate it!

Mnpctech
  • 5 years ago

turned out sweet, the small feets can be found here, https://www.mnpctech.com/products/grooved-pc-case-feet-small

Chooko
  • 5 years ago

Yep, those are definitely the ones. I'll give them a plug here too. They are very nicely made, look great, and do their job. I am very happy with this upgrade over the stock case feet.

currypowpow89
  • 4 years 8 months ago

Would you build this again?

Chooko
  • 4 years 8 months ago

Yes, I would definitely build this again. It has been all around the world with me with zero issues, is a powerful computer that suits all my needs, and it also starts a lot of conversations in airports, etc, with curious people. I am very happy that I built this, and have had nothing but positive experiences with it. The only thing that I might change were I to build it now, would be to start with a motherboard with more SATA ports. I didn't realize when I chose the motherboard, just how many SSD's I was going to cram into this thing. As it stands I have to physically swap the SATA data and power cables back and forth between two of my SSD's. I think an NVME SSD in the M.2 slot might also free up a SATA port, but I haven't gotten around to messing with it.